|
Working with Depron
As a lightweight modern material used extensively in small model aircraft, and following a comment by Brett McCormack about the strength and stiffness requirements of footy hulls, I decided to dabble in Depron for my hulls.
Using the standard hull side templates provided for the Bill Hagerup Razor 3 Footy I drew the shapes onto 3mm Depron sheet (smooth side out), taking care not to tear the edge (Depron tears very easily, unless the scalpel is very sharp- its better to make several shallow cuts with a shallow blade angle). The deck and transom edges were trimmed to account for the thicker material compared to the designed plywood/balsa. Unlike balsa which can require soaking to achieve a decent prebend; Depron can be formed by rolling it across a suitable radius applying pressure with your hands.
The chine edges between the sides and bottom panels were chamfered using a emery stick (cheap bulk packs of nail file sticks work well, with the card backing allowing radii to be created).
Assembly is by ‘uhu-por’ a foam safe contact adhesive, a panel at a time. Spread the glue thinly on both sides of the seams, press together, and then separate for 5 minutes until the glue dries tacky. The panels are then joined, working along the seam from one end to the other, the bond forming instantly when the joint is pressed together firmly.
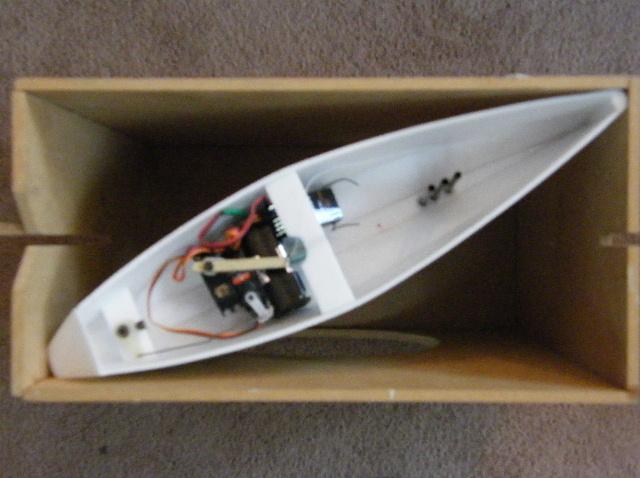
Where required extra reinforcement is required either 3 or 6mm Depron, balsa, ply, or light ply (or anything else you want) can be uhu-por bonded to the structure. For the Razor 3, 1/16th balsa was used around the mast steps, and rudder/fin supports, whilst on the Ranger a small patch of 1/64th ply surrounds the mast tube. Conversely the rudder tube is just bonded into a surround of 6mm Depron. For strength and stiffness, the Ranger’s fin is made of a 3mm carbon tube, with 3mm balsa bonded forward and aft to form a smooth fin section. The fwd part of the fin and carbon tube are carried through to a 6mm reinforcement patch under the deck, allowing the fin to cantilever, and the hull to carry the rig loads easily to the fin.
If well built you will now have a strong (ish) light, and relatively stiff structure, which is waterproof. Depron does suffer easily from ‘hanger rash’; however this can be overcome to a large extent with external sealing. I use an old model aircraft technique applying a layer of lightweight modelling tissue to the external surface using WBPU (water based poly urethane) varnish. Where a full layer isn’t required, strips can be run along the joint lines. This helps retain integrity of the joint should the hull be involved in any mishaps. Above the WBPU any form of paint (acrylic, emulsion, or enamel can be used, though acrylic is my preferred option).
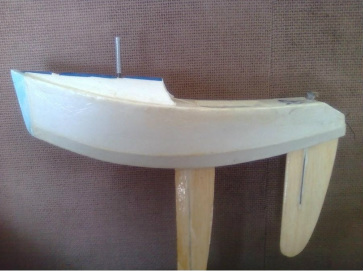
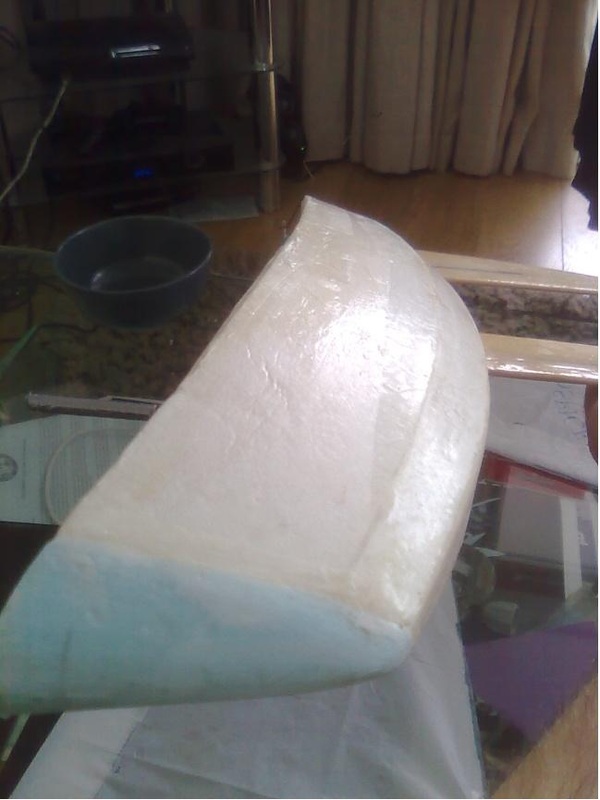
The edges of this reinforcement can just be seen in the bow on shot of my Ranger.
With Depron it is very easy to produce a ‘light weight’ hull, that is adequately stiff and strong- though care must be taken during handling, as it is possible to crease the Depron with excessive pressure.
Using the standard hull side templates provided for the Bill Hagerup Razor 3 Footy I drew the shapes onto 3mm Depron sheet (smooth side out), taking care not to tear the edge (Depron tears very easily, unless the scalpel is very sharp- its better to make several shallow cuts with a shallow blade angle). The deck and transom edges were trimmed to account for the thicker material compared to the designed plywood/balsa. Unlike balsa which can require soaking to achieve a decent prebend; Depron can be formed by rolling it across a suitable radius applying pressure with your hands.
The chine edges between the sides and bottom panels were chamfered using a emery stick (cheap bulk packs of nail file sticks work well, with the card backing allowing radii to be created).
Assembly is by ‘uhu-por’ a foam safe contact adhesive, a panel at a time. Spread the glue thinly on both sides of the seams, press together, and then separate for 5 minutes until the glue dries tacky. The panels are then joined, working along the seam from one end to the other, the bond forming instantly when the joint is pressed together firmly.
Where required extra reinforcement is required either 3 or 6mm Depron, balsa, ply, or light ply (or anything else you want) can be uhu-por bonded to the structure. For the Razor 3, 1/16th balsa was used around the mast steps, and rudder/fin supports, whilst on the Ranger a small patch of 1/64th ply surrounds the mast tube. Conversely the rudder tube is just bonded into a surround of 6mm Depron. For strength and stiffness, the Ranger’s fin is made of a 3mm carbon tube, with 3mm balsa bonded forward and aft to form a smooth fin section. The fwd part of the fin and carbon tube are carried through to a 6mm reinforcement patch under the deck, allowing the fin to cantilever, and the hull to carry the rig loads easily to the fin.
If well built you will now have a strong (ish) light, and relatively stiff structure, which is waterproof. Depron does suffer easily from ‘hanger rash’; however this can be overcome to a large extent with external sealing. I use an old model aircraft technique applying a layer of lightweight modelling tissue to the external surface using WBPU (water based poly urethane) varnish. Where a full layer isn’t required, strips can be run along the joint lines. This helps retain integrity of the joint should the hull be involved in any mishaps. Above the WBPU any form of paint (acrylic, emulsion, or enamel can be used, though acrylic is my preferred option).
The edges of this reinforcement can just be seen in the bow on shot of my Ranger.
With Depron it is very easy to produce a ‘light weight’ hull, that is adequately stiff and strong- though care must be taken during handling, as it is possible to crease the Depron with excessive pressure.
Last Picture courtesy of Bill Hagerup - his Depron Cobra 5, showing minimal internal structure.