
|
How to make Simple Soft Sails for a balanced swing rig
Is an original article by Roger Stollery, as time has gone on the soft sails have develeped, just as things are apt to do in the Footy world and the information you see here is that original article adapted to include the current practice.
The original article is available as a slide show presentation at the bottom of the page. |
|
|
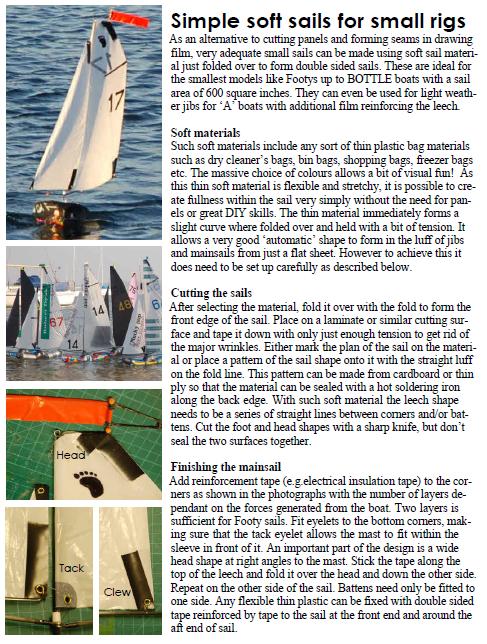
Simple soft sails for small rigs
(the text for this article has been altered from the original in order to reflect current practice.) As an alternative to cutting panels and forming seams in drawing film, very adequate small sails can be made using soft sail material just folded over to form double sided sails. These are ideal for the smallest models like Footys up to Bottle boats with a sail area of 600 square inches. They can even be used for light weather jibs for ‘A’ boats with additional film reinforcing the leech. |
|
Soft materials
Such soft materials include any sort of thin plastic bag materials such as dry cleaner’s bags, bin bags, shopping bags, freezer bagsetc. The massive choice of colours allows a bit of visual fun! As this thin soft material is flexible and stretchy, it is possible to create fullness within the sail very simply without the need for panels or great DIY skills. The thin material immediately forms as light curve where folded over and held with a bit of tension. It allows a very good ‘automatic’ shape to form in the luff of jibs and mainsails from just a flat sheet. However to achieve this it does need to be set up carefully as described below.
Cutting the sails
After selecting the material, fold it over with the fold to form the front edge of the sail. Place on a laminate or similar cutting surface and tape it down with only just enough tension to get rid of the major wrinkles. Either mark the plan of the sail on the material or place a pattern of the sail shape onto it with the straight luff on the fold line. This pattern can be made from cardboard or thin ply so that the material can be sealed with a hot soldering iron along the back edge. With such soft material the leech shape needs to be a series of straight lines between corners and/or battens. Cut the foot and head shapes with a sharp knife, but don’t seal the two surfaces together.
|
Finishing the mainsail
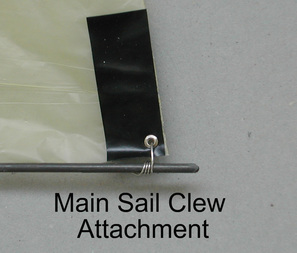
Add reinforcement tape (e.g. electrical insulation tape) to the tack and clew as shown in the detail photographs with the number of layers dependant on the forces generated from the boat. One layer either side is sufficient for Footy sails. |
|
Fit eyelets to the bottom corners, inserting the mast into the sail to make sure that the tack eyelet allows the mast to fit within the sleeve in front of it. |
|
|
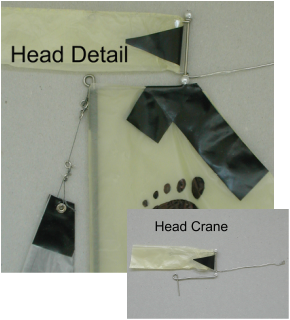
An important part of the design is a wide head shape at right angles to the mast. Insert the head crane into the mast and then allow it to settle so that the wind indicator post is at the rear of the head. Stick the tape along the top of the leech and fold it over the head and down the other side. Repeat on the other side of the sail. Now make a small slit along in the tape along the top of the head to allow the mast back to the front of the main sail. |
|
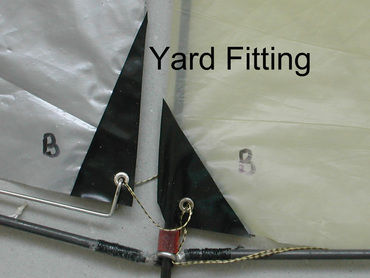
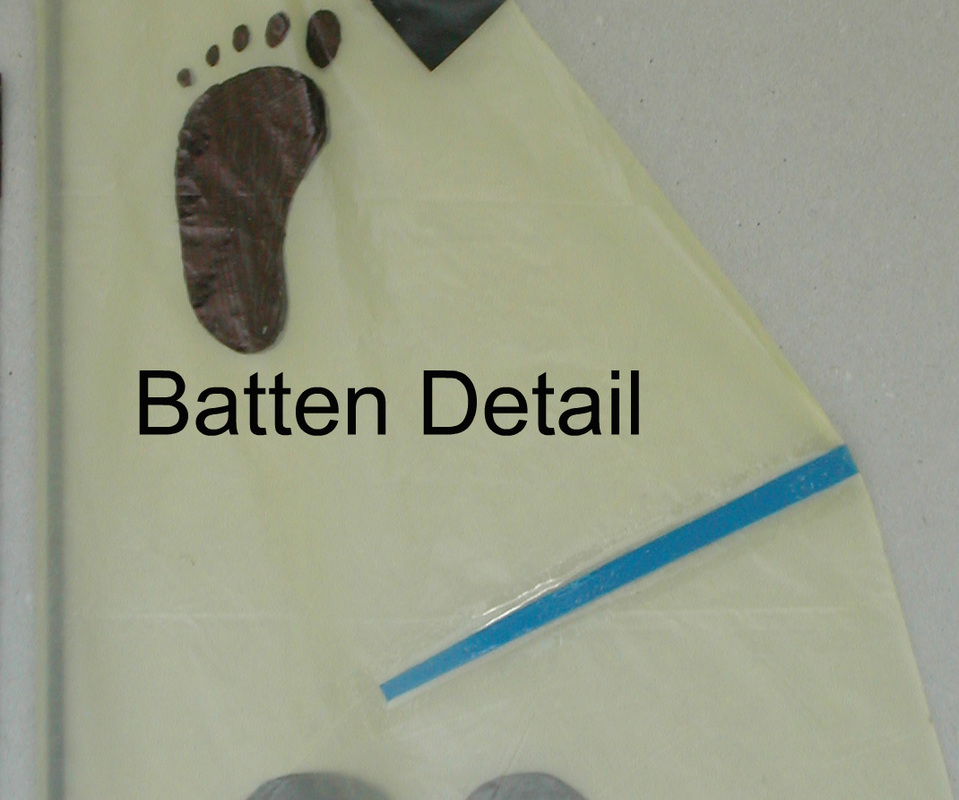
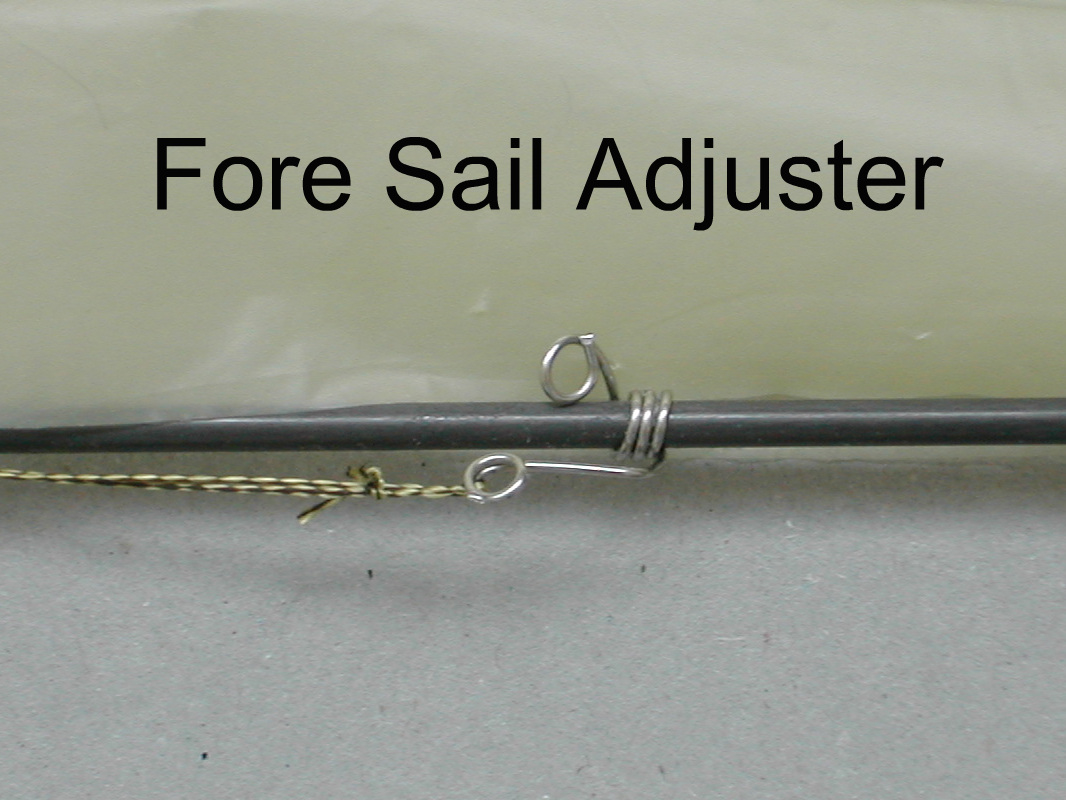
A batten need only be fitted to one side usually the Port side so that sail identification numbers can be added easily. Any flexible thin plastic can be fixed with double sided tape reinforced by tape to the sail at the front end and around the aft end of sail. Slide the fore sail adjuster onto the main yard ensuring it is a reasonably tight fit and add the clew attachment placing the wire hook into the main sail clew eyelet. |
|
|
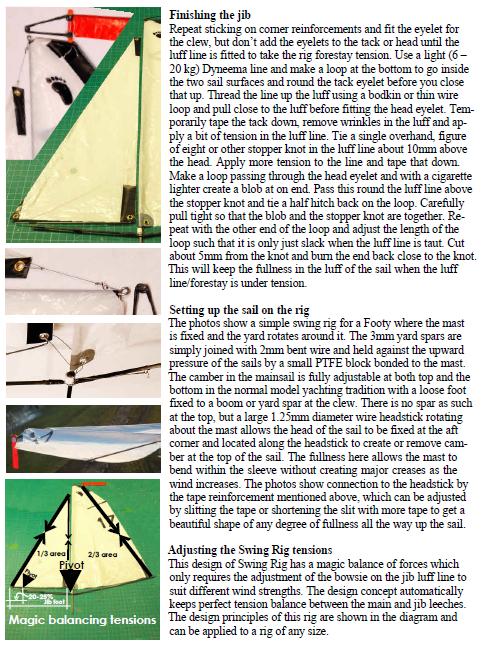
Finishing the jib
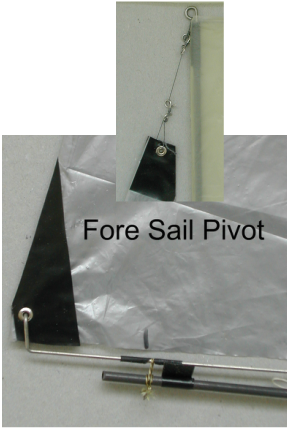
Repeat sticking on corner reinforcements and fit the eyelet for the clew, but don’t add the eyelets to the tack or head until the luff line is fitted to take the rig fore stay tension. Use a light (6–20 kg) Dyneema line and make a loop at the bottom to go inside the two sail surfaces and round the tack eyelet before you close that up. Thread the line up the luff using a bodkin or thin wire loop and pull close to the luff before fitting the head eyelet. Tie a bowsie to the head eyelet using a short length of thread finishing it about 10mm (3/8”) from the head. Now thread the luff line onto this bowsie and holding the tack eyelet pull the bowsie up the line until the sail is taut. Place the wire fore sail boom onto the sail and tie to the fore yard. Try to keep this as close as possible, however it does still need to operate This can be most easily be achieved by looping the pivot thread around the wire boom between the previously positioned electrical shrink wraps, then looping both ends over the fore yard in opposite directions, place a piece of spare 3mm carbon tube between the two booms and tie off tight. Remove the carbon tube and you have the perfect pivot. Thread the second bowsie onto the luff line at the head and loop the line through the head crane and adjust the bowsie position and tensions so that the clew of the fore sail is aligned with the tack of the main sail. |
|
A bit of trial and error is required here to get the adjustments right.
Once you have it looking right tie the luff line to the uppermost bowsie. This will keep the fullness in the luff of the sail when the luff line/fore stay is under tension.
Once you have it looking right tie the luff line to the uppermost bowsie. This will keep the fullness in the luff of the sail when the luff line/fore stay is under tension.
|
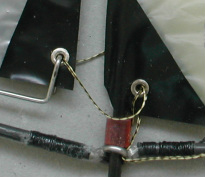
All that remains is to thread a line through the fore sail at the clew eyelet take both ends of this line and pass them in turn through the main sail tack eyelet so they appear on the opposite side, now pass them both down through the wire loop of the yard attachment at the rear and tie them to the fore sail adjuster. These lines will act as both adjustment for the gap at the leech of the fore sail and also an automatic down haul for the main sail.
|
|
|
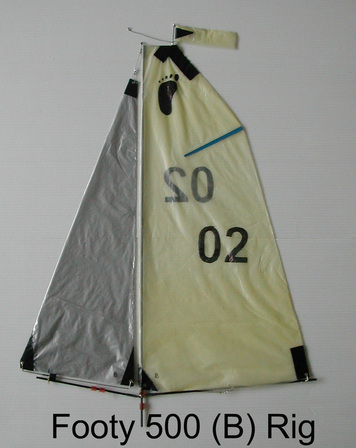
Setting up the sail on the rig
The photos show a simple swing rig for a Footy where the mast is fixed and the yard rotates around it. The 3mm yard spars are simply joined with 2mm bent wire and held against the upward pressure of the sails by a small PTFE block bonded to the mast. The camber in the mainsail is fully adjustable at both top and the bottom in the normal model yachting tradition with a loose foot fixed to a boom or yard spar at the clew. There is no spar as such at the top, but a large 1.25mm diameter wire head stick rotating about the mast allows the head of the sail to be fixed at the aft corner and located along the head stick to create or remove camber at the top of the sail. The fullness here allows the mast to bend within the sleeve without creating major creases as the wind increases. The connection to the head stick by the tape reinforcement mentioned above, which can be adjusted by slitting the tape or shortening the slit with more tape to get a beautiful shape of any degree of fullness all the way up the sail. |
|
Adjusting the Swing Rig tensions
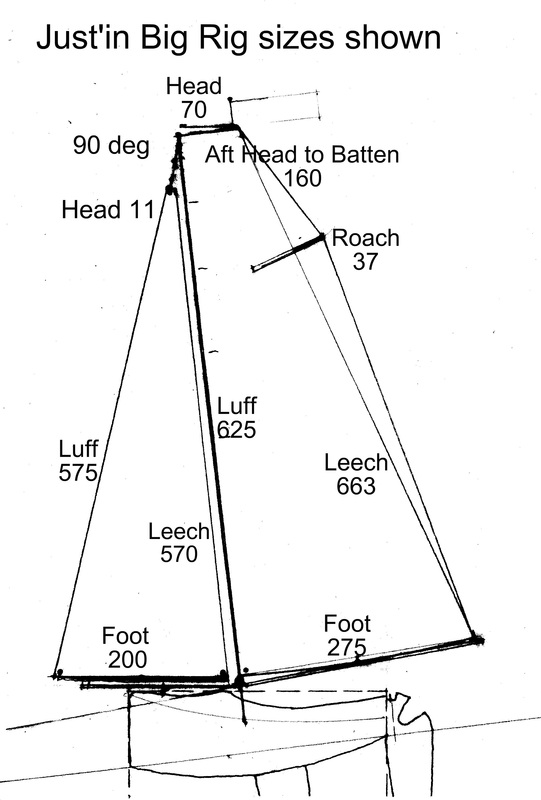
This design of Swing Rig has a balance of forces which only requires the adjustment of the bowsie on the jib luff line to suit different wind strengths. The design concept automatically keeps perfect tension balance between the main and jib leeches. The design principles of this rig are shown in the diagram and can be applied to a rig of any size.
This design of Swing Rig has a balance of forces which only requires the adjustment of the bowsie on the jib luff line to suit different wind strengths. The design concept automatically keeps perfect tension balance between the main and jib leeches. The design principles of this rig are shown in the diagram and can be applied to a rig of any size.
|
|
|
|
| ||||||
Original Article by Roger Stollery
|
|
