
|
How to Make Simple McRig Sails
|
How did the "Una" rig get it's name?
"The catboat is unquestionable an American craft. When one was sent to Cowes in 1852 by William Butler Duncan as a gift to the Marquis of Connyngham she was at once recognized as an American novelty; and her name, "Una" was adopted and is still in use in England to describe her type. " William P. Stephens published in Traditions and Memories of American Yachting part 37 |
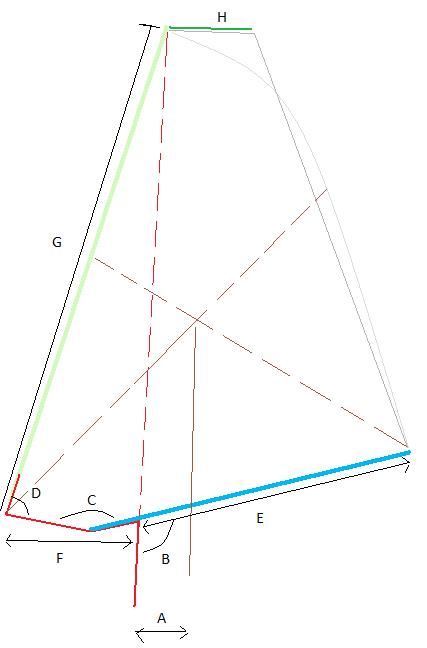
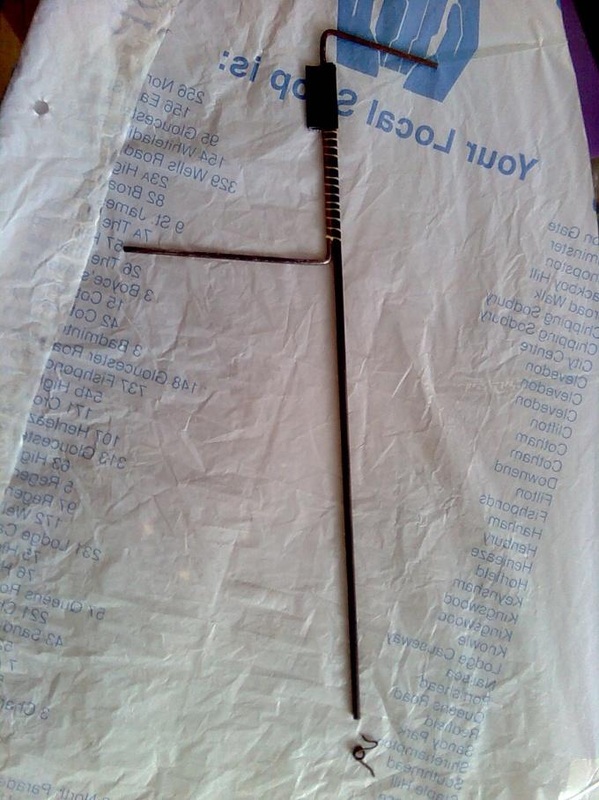
The Z wire is bent to shape and the boom attached to the 3-5cm in front of the pivot (depending on rig size). Most of the rigs can use a straight section between the mast and pivot, but with later rigs (and in order to allow clearance over the box by raising the booms tail end (whilst not raising the whole rig)) the fore section has been ‘kinked’ to lower the mast position whilst clearing the bow.
The tip of the mast should lie approximately above the line of the mast step, as this seems to give a good all round performance. It is worthwhile mentioning that you should put something hard in the bottom of the mast tube to stop the wire mast drilling a hole in the bottom of the boat.
The tip of the mast should lie approximately above the line of the mast step, as this seems to give a good all round performance. It is worthwhile mentioning that you should put something hard in the bottom of the mast tube to stop the wire mast drilling a hole in the bottom of the boat.
|
|
Mast and boom are of mainly linear wound 2mm ID 3mm OD carbon tube. The biggest rig is using a 4mm OD lower section for increased stiffness.
| Measurement | A (mm) | B (deg) | C (Deg) | D (Deg) | E (mm) | F(mm) | G (mm) | H (mm) |
| Storm | 40 | 100 | 170 | 75 | 160 | 85 | 300 | 80 |
| C | 40 | 95 | 175 | 75 | 170 | 85 | 500 | 45 |
| B | 40 | 96 | 174 | 80 | 205 | 120 | 500 | 75 |
| A | 40 | 95 | 180 | 70 | 260 | 135 | 550 | 125 |
| A+ | 40 | 98 | 162 | 90 | 270 | 140 | 800 | 100 |
|
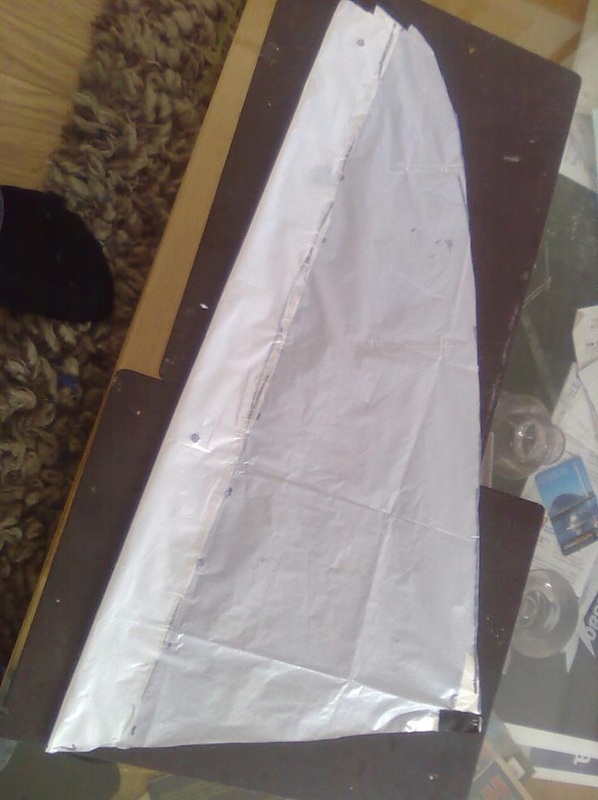
The mast and boom geometry are created first, then they are laid out upon the sail material (big thin plastic bags). A luff seam is drawn on, at about 30-50mm in front of the mast position (which is subsequently marked). The foot is cut at the rear of the boom (allows the fitting to sit forward, creating camber). Depending on your choice of flat head, or rounded Leach, it is then drawn out. Quickly check the approximate Center of Effort (should sit about 40mm behind the mast step)
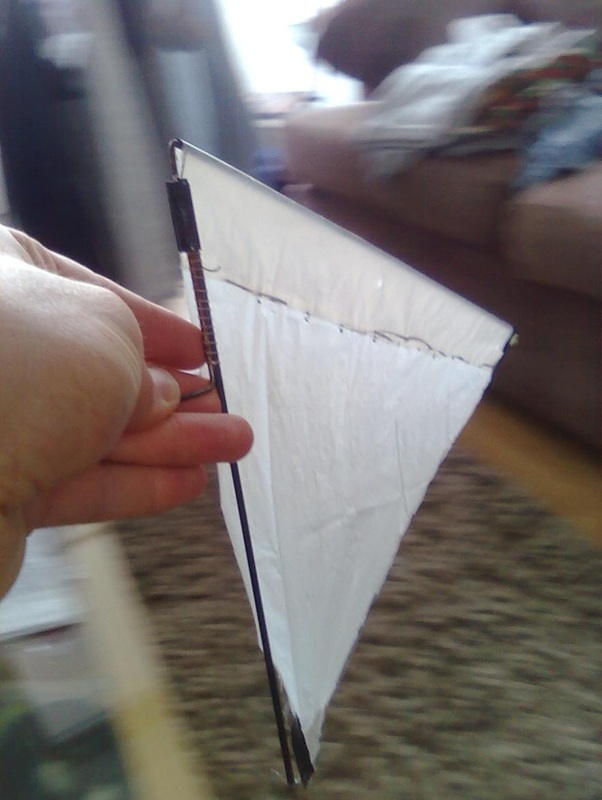
The sail is cut out, and then with the mast laid in position, the extent of the overlap is marked on the sail. A line of double sided tape is used to stick the luff seam back to the main sail, creating a smooth mast pocket. (Alternatively the pocket can be stuck using ordinary tape on the outside seam).
Duct tape is used to reinforce the corners of the tack and clew. (Using 3-5cm strips run along the key edges). Sail batons are added to the leech, made from clear plastic (pop bottles) attached with tape.
|

|
