
|
Back Bay "Nipper" McRigs
|

Download in pdf
|
|
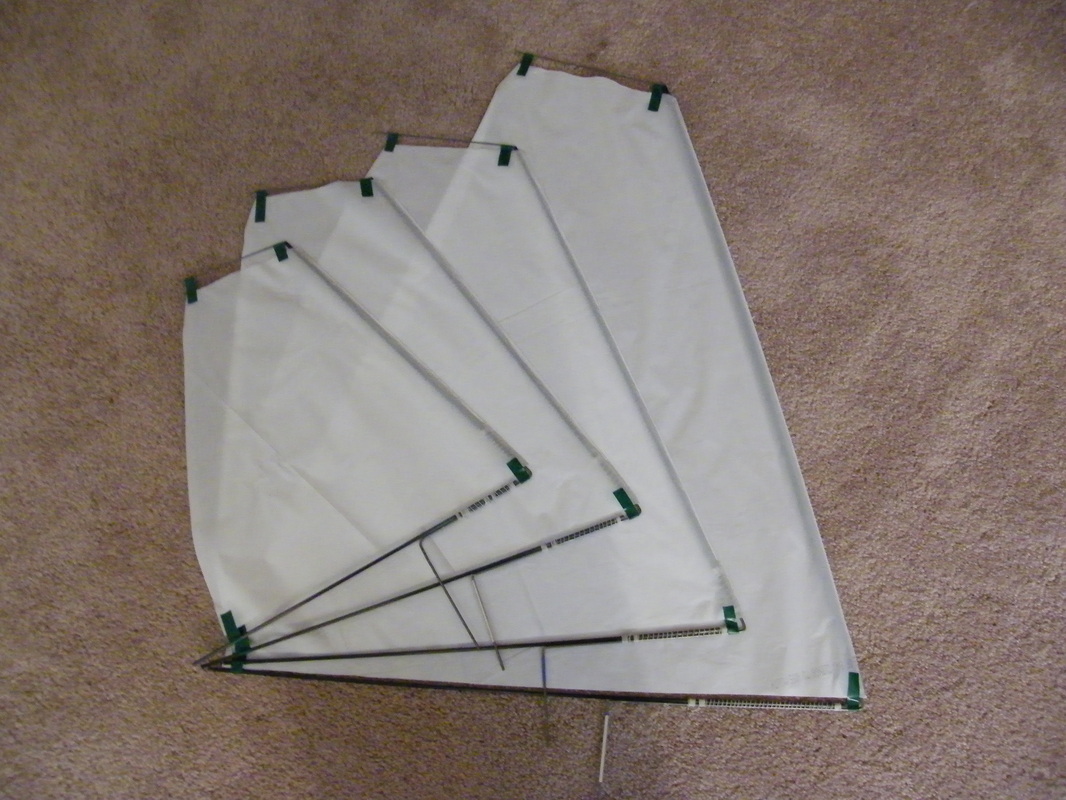
The Footy Class rule allows rigs to be unlimited in both size and number. (Ed note in the UK we limit the max rig size using the Big Rig Template, all the dimensions for these rigs are within the Big Rig rules). The good news is that the rule gives us a lot of opportunity to match the rig to wind conditions during a regatta. The bad news is that it means a skipper needs multiple rigs to be competitive in serious racing.
Some people have been intimidated by the idea of building three or four rigs. I have hesitated, too. While I am happy to build hulls, sails have never been my strong suit :-) I have used a beautiful set of rigs, built by my good friend Scott Spacie, for several years. But when I needed to make an additional set of rigs for an upcoming regatta, I decided to try building really cheap, simple rigs that anybody…even me…can build easily and quickly. The challenging part was that the rigs also need to be competitive…to stand up against the best in championship racing. |
|
What you need
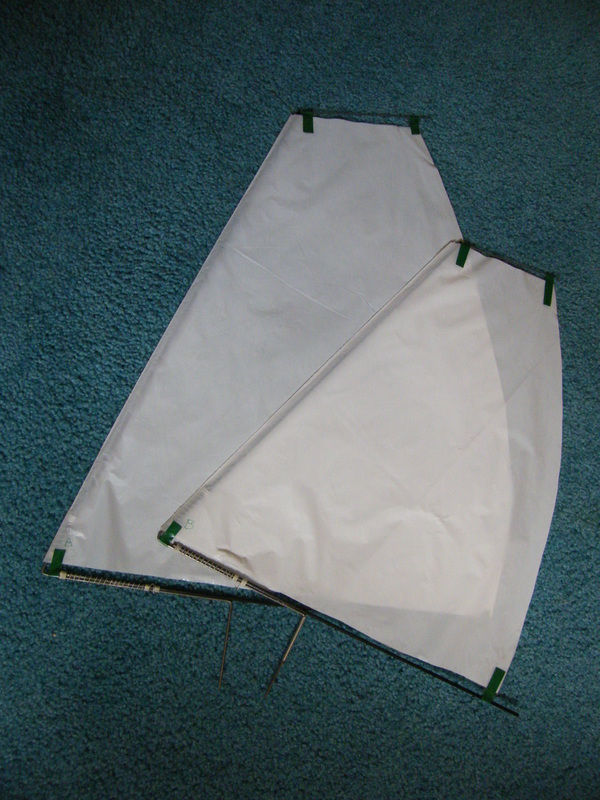
I made my sails from the a plan wich comes with the HalfPint Too. I just cut off the top of each rig to give it more of a gaff-rig look, and used a wire mast crane to support the squared-off top or the sail. Scott’s sails are paneled, and made with TriSpi25. TriSpi is a pretty expensive material that is difficult to find, so I needed an alternative. Taking the lead from my British friends, I found a source of cheap, effective material in an unexpected place…my kitchen garbage can. Not the garbage…the bags!
In addition to low cost, Glad kitchen garbage bags are a little stretchy, so they take a nice shape in the wind without having the complication of making panels. They don’t look like much on the bench, but when a breeze comes, they set very nicely.
Other materials you’ll need are some 1/8 inch pultruded carbon tubes, 1/16 inch diameter wire, 3/32 inch diameter wire, some braided fishing line, packing tape, and some plastic electrical tape.
|
Assembling the spars
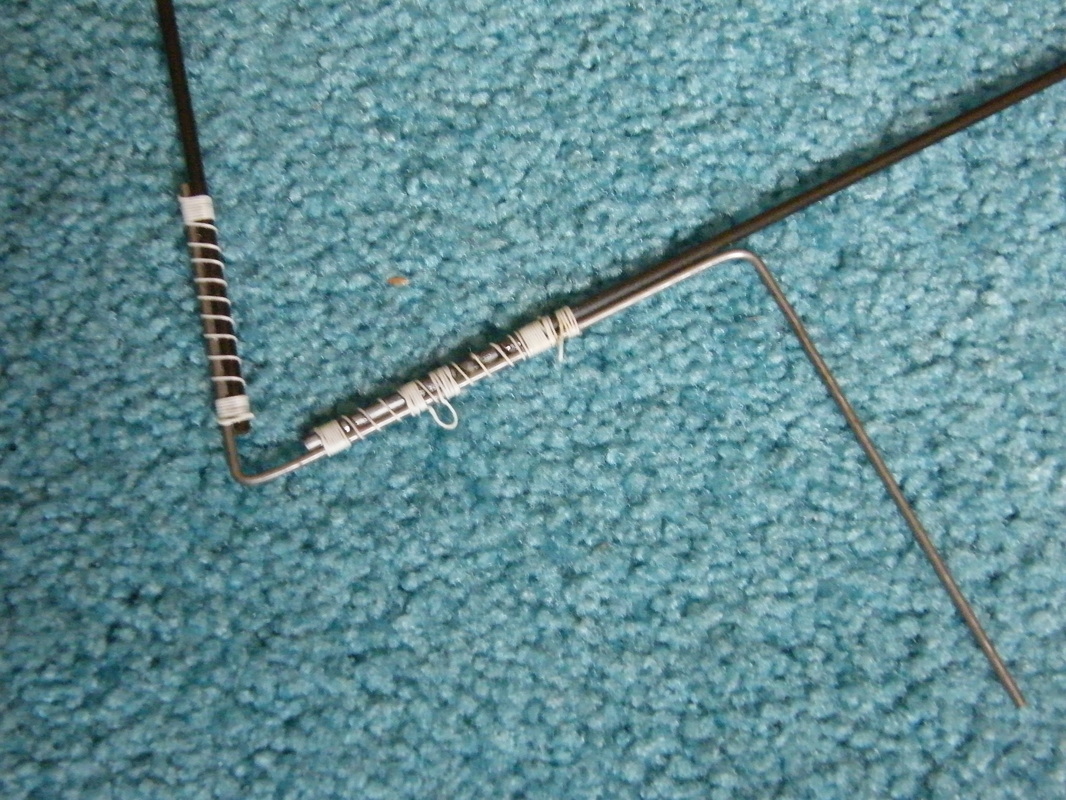
Start your rig by bending the 3/32 Z-wire, and cut it to length. Then cut two spars from your 1/8 inch carbon tube. Tack the boom in place with a little CA glue, then wrap the boom/Z-wire join with fishing line. Saturate the completed wrap with CA, and do it all again for the mast. Now bend a piece of the thin wire for the mast crane and cut it to length. Insert the mast crane into the top of the mast tube, but do NOT glue it. It’s important that the wire be able to revolve in the tube, to allow the proper twist in the sail. |
|
Making the sail
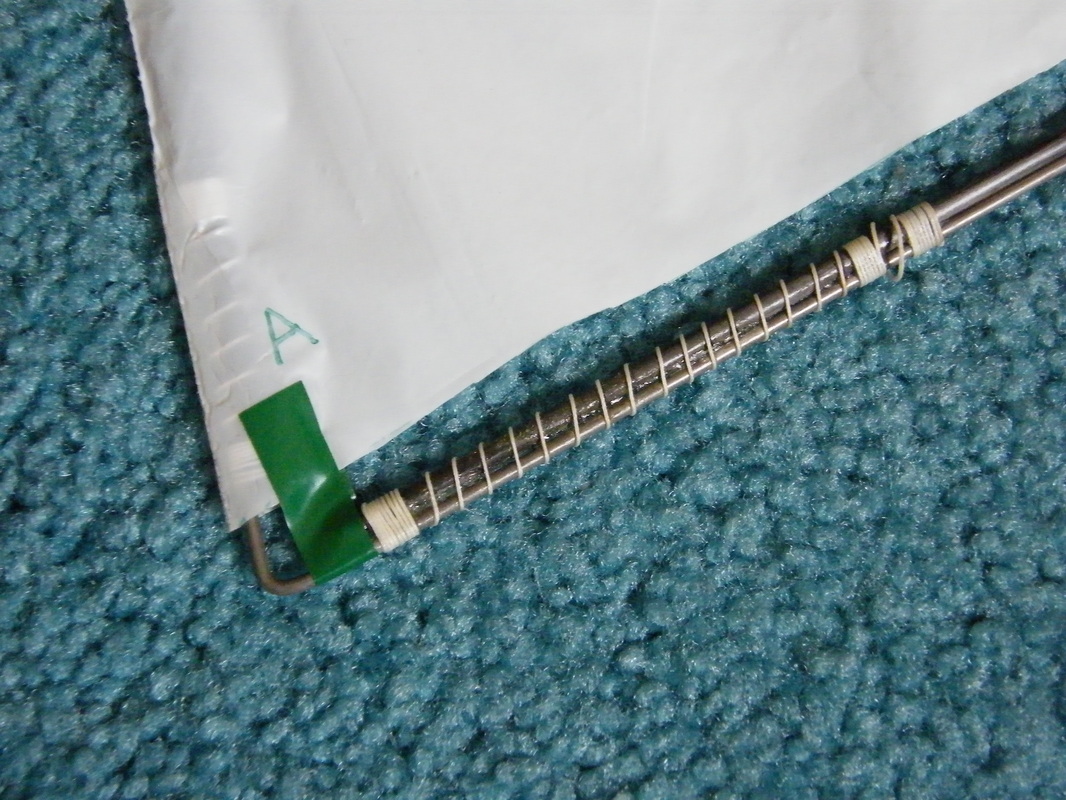
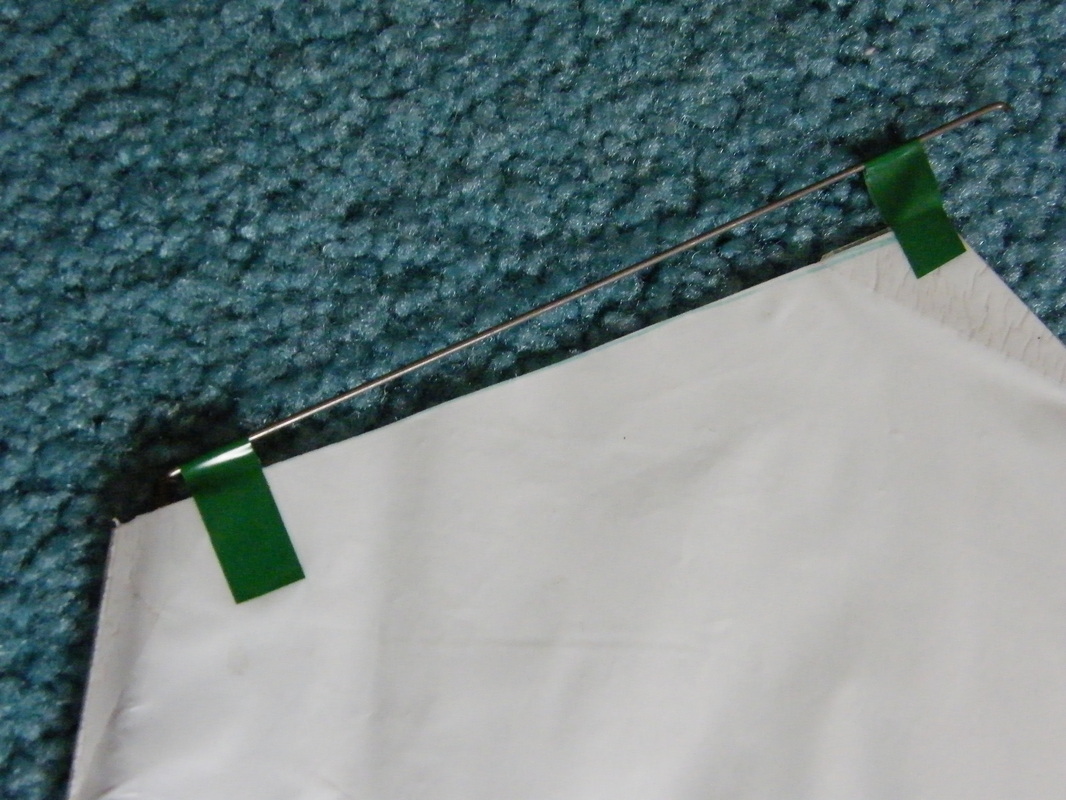
The sail is a full double-luff type. Lay the bag of your choice on the table, and insert your rig into the bag so that the mast is tight against the side seam of the bag. That seam on the bag will be the luff of the sail. Draw the shape of the sail on the bag using a fine Sharpie, then cut the sail out with a sharp X-acto knife. Reinforce the corners of the sail with packing tape. I use the transparent kind. Don’t use the fiber-reinforced stuff…that’s overkill. Put tape on both sides of the sail. When you trim the tape, leave a little extra over the edges to keep the two sides of the sail together. |
|
|
Putting it together
Cut a length of electrical tape in half, so that you get strips about ¼ inch wide. Tape the four corners of the sail to the spars and mast crane. McRig sails work best with considerable camber…people often set them too flat, based on their experience with swing or conventional rigs. Give your sail plenty of shape. The tricky part is getting a nice shape without any big wrinkles. Small adjustments of the taped positions can really pay off, here, so be patient and it will pay off. |
Now go sailing
See how easy and cheap that was? Don’t let the low-tech look discourage you from trying the Glad-bag approach. I used these rigs in the Sasquatch Regatta in Wolfeboro, NH. My Shadow was doing very well, including two bullets against some of the best Footy skippers in the country, before retiring with water ingress problems.
See how easy and cheap that was? Don’t let the low-tech look discourage you from trying the Glad-bag approach. I used these rigs in the Sasquatch Regatta in Wolfeboro, NH. My Shadow was doing very well, including two bullets against some of the best Footy skippers in the country, before retiring with water ingress problems.
