
|
Building the Back Bay "Nipper"
|
|

The Back Bay Skippers club in Wolfeboro, NH, has conducted a very successful winter building program for Soling One Meters for the last few years. Since several members have expressed interest, we are going to expand the build program to include Footys this year.
The prospective builders have little scratch building experience, so I decided to design a boat that is as simple as possible to build, yet can compete with any Footy out there. Footys are great little boats that can be built on the kitchen table and still be highly competitive…for about $50.00 including servos!
I built mine using 1/16 balsa for the side panels, deck, bow, stern, and bottom panels. If you can get 1/64 birch ply, you can use that for the sides and bottom. The ply is very thin and flexible, so it can be cut with scissors and doesn’t need to be pre-bent before assembly.
|
Assembling the Hull
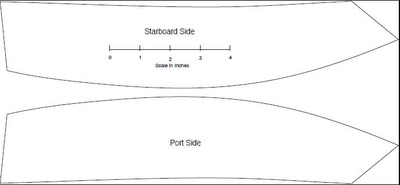
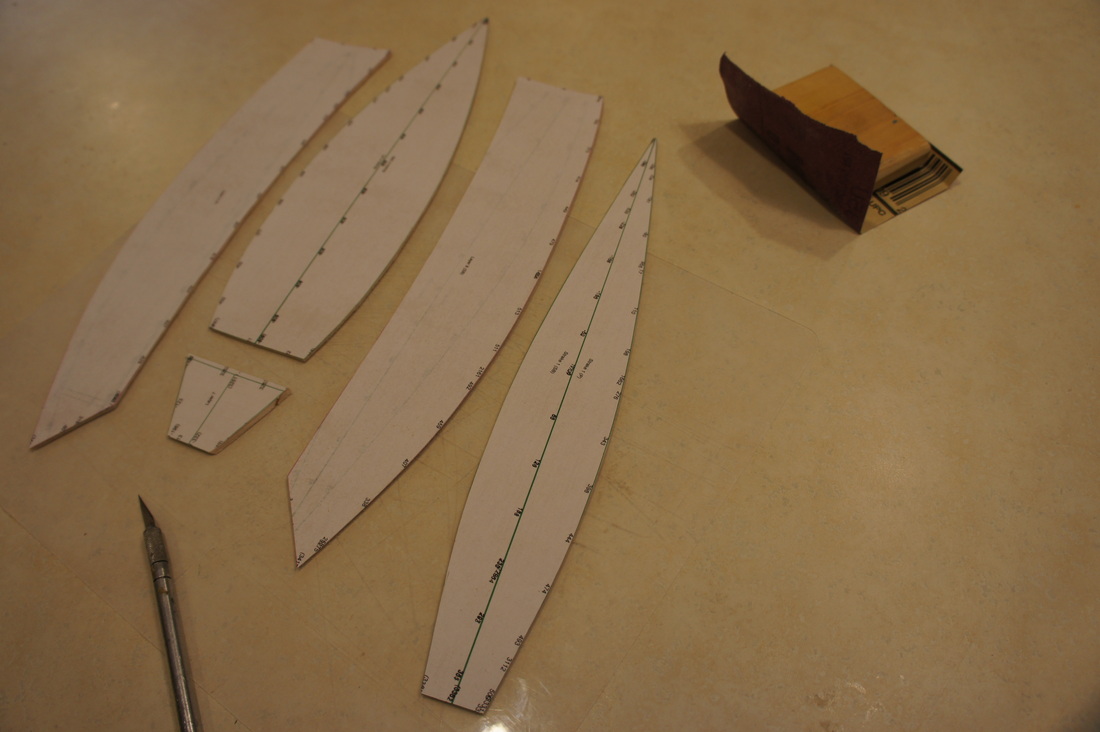
Transfer the plan to your wood sheets and carefully cut the panels to size. If you are using balsa, bevel the edges at about 45 degrees so that when the panels take the hull shape, they fit tightly together. Make sure you bevel the proper edges in the proper direction! |
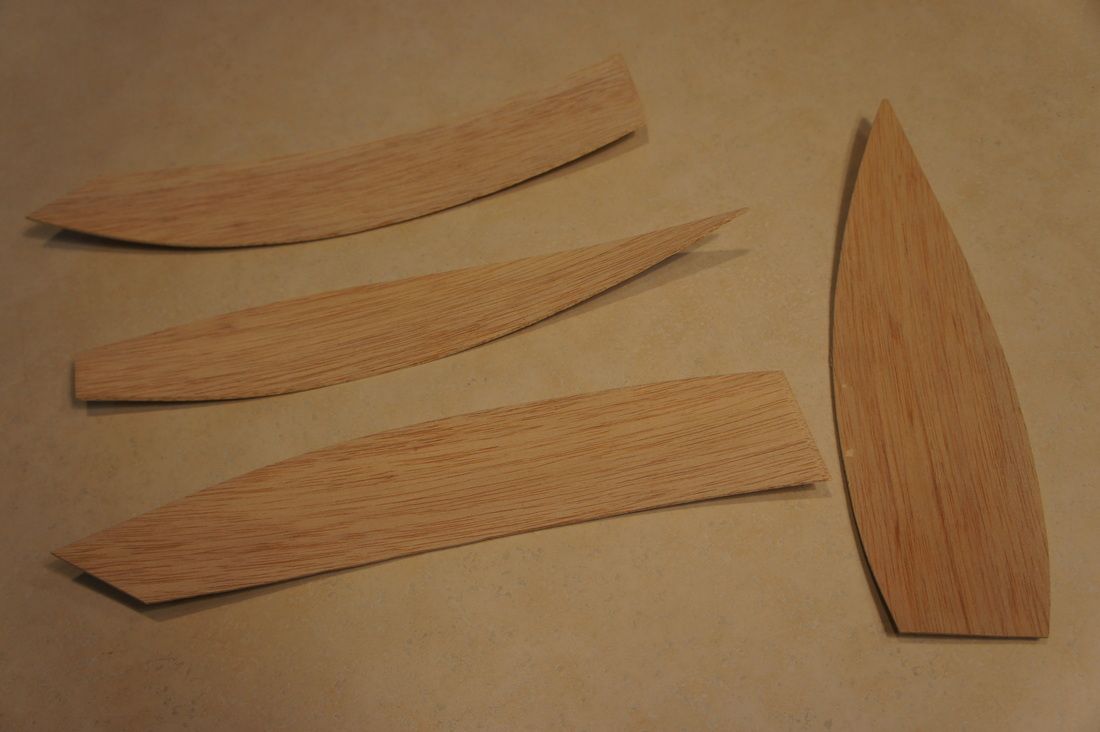
Balsa panels after cutting
|

Panels taped to the water softner
|
If you are building your boat with 1/16 balsa, pre-bending the panels will make assembly easier and prevent splitting the wood. Spray the panels on both sides with an ammonia-based cleaning product and tape them securely to something big an round. I use our water softener, but you might use a water heater or a lobster pot. If you don’t have a “lobsta”pot, then you must be “from Away.”
Pre-bent panels ready for assembly.
|
Many boats are put together by mounting frames on a building jig, then gluing bottom and side panels to the frames. I use a different technique. Since Footys are small, they don’t need internal bulkheads to be rigid and strong. Internal framing just adds undesirable weight to the hull. Instead, I use a technique that people now call an “air build.” All the panels are taped together, then glued once everything is tight and straight.
|
Assembling the panels takes patience and careful work. Start from the stern and work your way up to the bow. Tape a couple inches on one side, then do the same on the other side. Alternating sides as you go helps keep everything straight and true. Use short pieces of tape, and pull your panels tightly together as you go along the seam. If the bevels are nice and you tape tightly, the inside and outside seams will look smooth and tight.
|
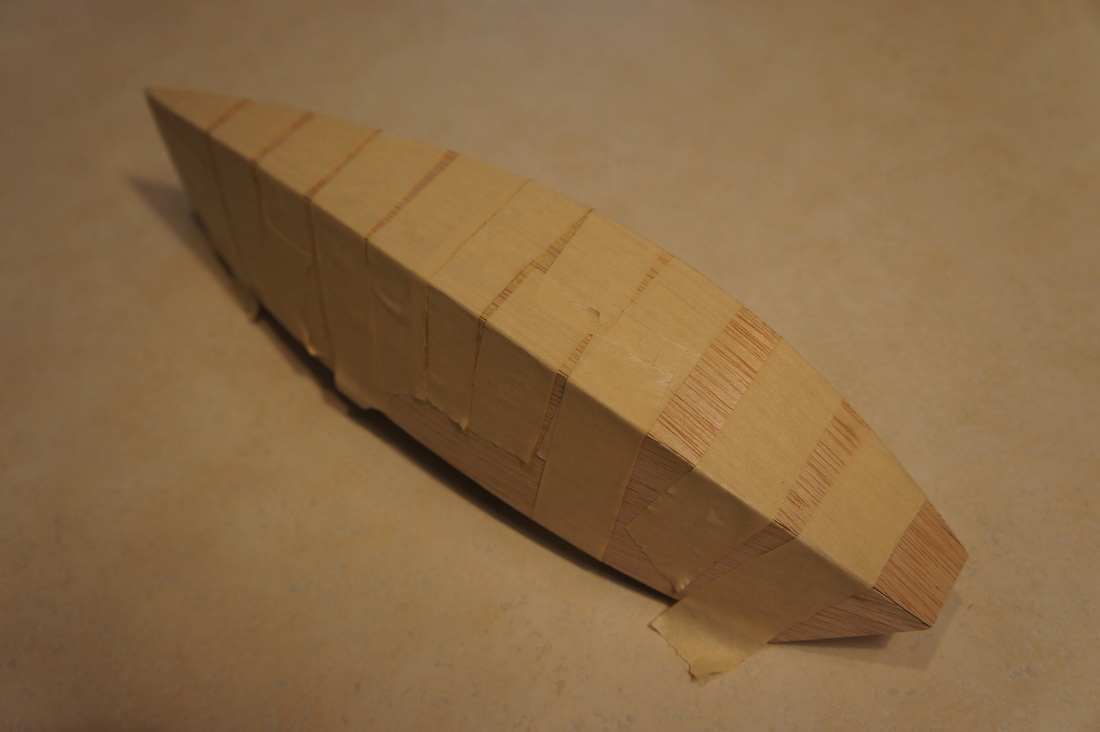
The hull taped together
|
Since no glue has been applied, this is the time to re-tape any place where you didn’t get things tight, or to adjust things if the hull seems to be twisted.
Next fit the bow and stern pieces. It’s important to bevel these pieces to get a good fit. Tack them in between the side panels with a couple drops of AC glue. Don’t glue them in solidly yet, or things may go crooked.
Next fit the bow and stern pieces. It’s important to bevel these pieces to get a good fit. Tack them in between the side panels with a couple drops of AC glue. Don’t glue them in solidly yet, or things may go crooked.
Gluing inside seams.
|
Insert a couple of temporary thwarts to spread the side panels to the proper beam. Make sure everything looks straight. Then to permanently bond the panels, run the glue of your choice down the seams inside the hull. |
Adding the deck, fin, bulb, rudder, and mast tube
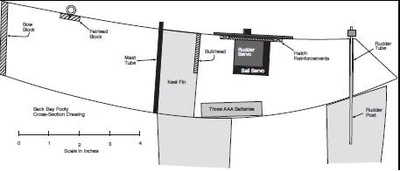
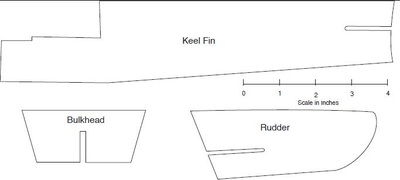
My fin is carved from 1/8 basswood. The fin inserts through the hull and is goes through the deck (don’t glue it yet!) It is reinforced by a bulkhead to give it strength and keep it vertical.
The bulb is sanded down from an 8 oz. trolling sinker. I secured it by gluing a 1/8 carbon tube into the bottom of the fin, then carefully drilling a 1/8 hole in the bulb and gluing it onto the rod and fin with CA.
The rudder tube and mast tubes are aluminum tubing, 1/8 internal diameter.
fin, rudder tube, and mast tubes glued inside hull.
|
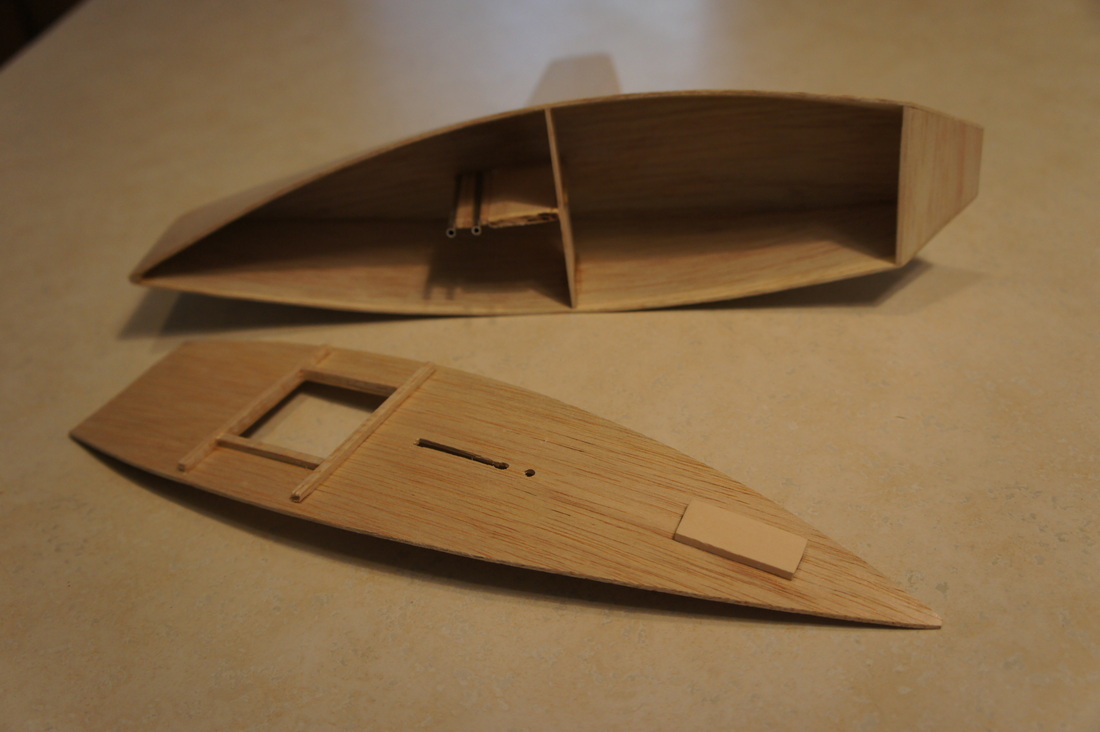
Cut the hatch from the deck (save it for later) and drill for the rudder and mast tubes. Reinforce the hatch opening with 3/16 square balsa. Also glue a block of basswood near the bow to reinforce the deck for your fairlead. Then seal the inside of the hull and bottom of the deck (I use clear Krylon spray paint.)
My rudder is carved from 1/8 balsa with a carbon tube for the rudder post. The post is reinforced with brass tubing over the top where the set screw bears against it to fasten the control horn. |
Cut the hatch from the deck (save it for later) and drill for the rudder and mast tubes. Reinforce the hatch opening with 3/16 square balsa. Also glue a block of basswood near the bow to reinforce the deck for your fairlead. Then seal the inside of the hull and bottom of the deck (I use clear Krylon spray paint.)
Carve the rudder from 1/8 balsa, and use 1/8 in OD carbon tube for the rudder post. The post is reinforced with brass tubing over the top where the set screw bears against it to fasten the control horn.
Glue the deck in place, taking care that everything remains lined up properly. Seal the outside surfaces with your choice of paint. Sealing with thinned epoxy or fancy paintwork can add a surprising amount of weight, so tread lightly.
|
Finishing the boat
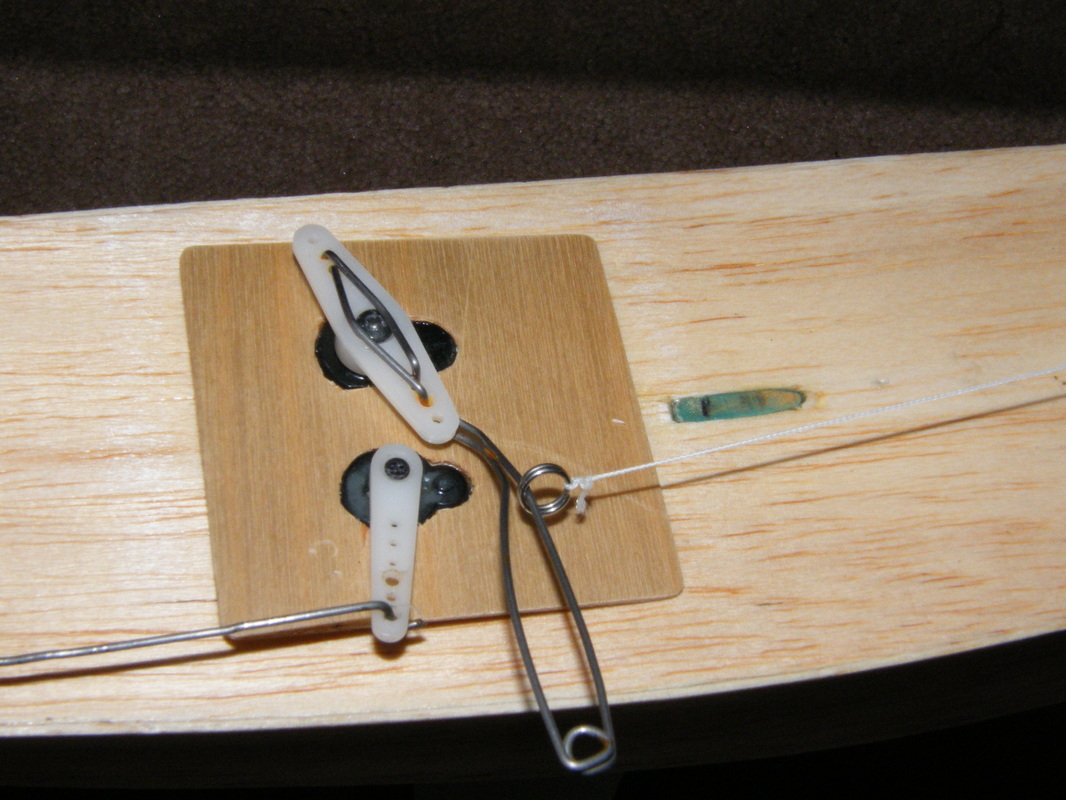
I attached the radio gear to the bottom of the hatch cover. The top layer of the cover is 1/64 ply, and the bottom layer is the 1/16 balsa cut out from the deck. Drill and cut the cover to fit your servos. You can use micro servos similar to Hitec HS-55 for rudder and HS-82mg for sails. Three AAA lithium’s in the bottom of the boat supply the power. |
|
|
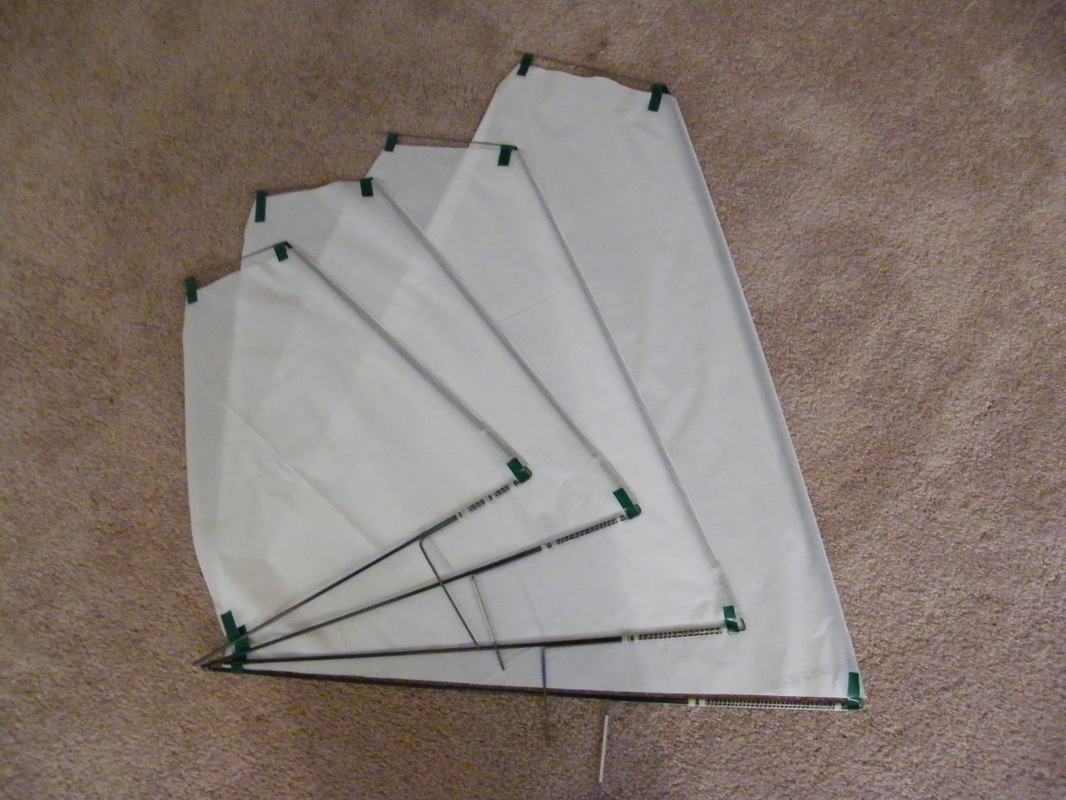
Assembling the Rigs
The Back Bay Nipper uses McRig’s because they are easy to build, easy to change, and very effective. The dimensions for these rigs (enough to handle most wind conditions) are illustrated in another article on the website. I found that Glad kitchen garbage bags made inexpensive, but surprisingly competitive sails. (Ed note, these sails would be suitable for most Footy designs where the deck runs level or almost level with the top of the box) |
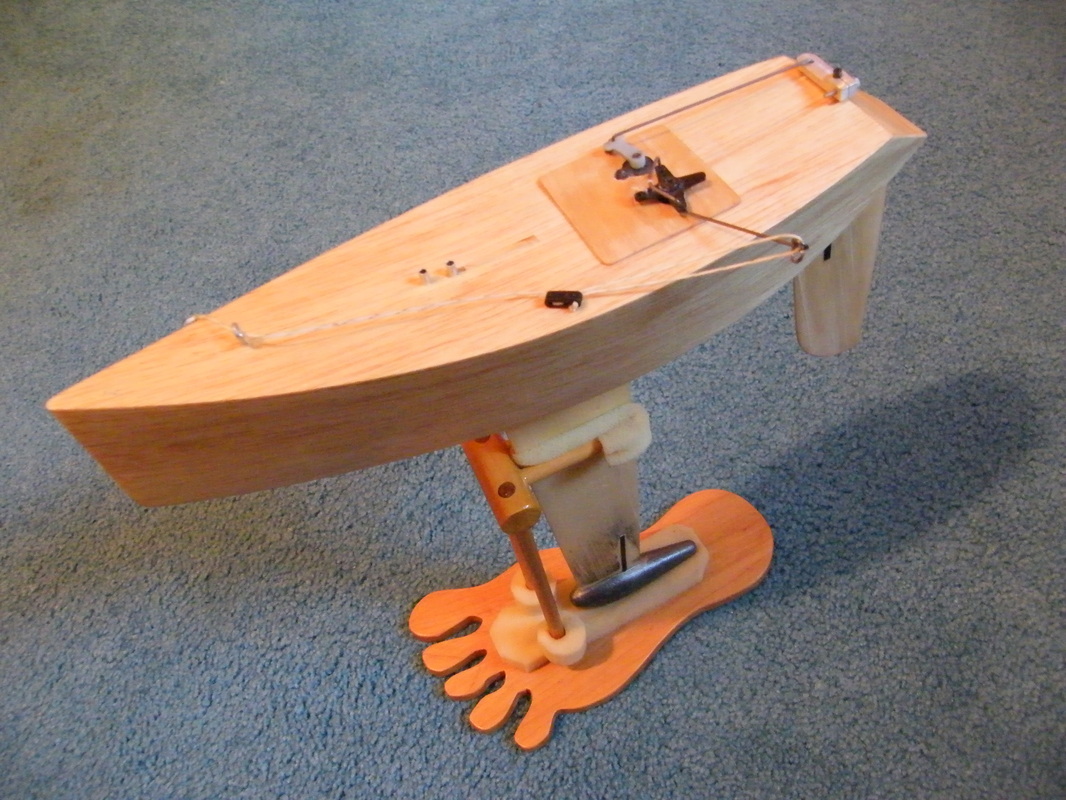
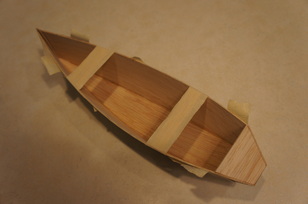
Ready to rock and roll
Carefully built, the Back Bay "Nipper" is light and takes advantage of diagonal placement in the box to get longer waterline length. Fitted with the proper rig, she will track straight upwind with no rudder correction and sail fast. I hope you’ll have fun building and sailing her…and beating some of those other Footys at your pond!
Carefully built, the Back Bay "Nipper" is light and takes advantage of diagonal placement in the box to get longer waterline length. Fitted with the proper rig, she will track straight upwind with no rudder correction and sail fast. I hope you’ll have fun building and sailing her…and beating some of those other Footys at your pond!
